
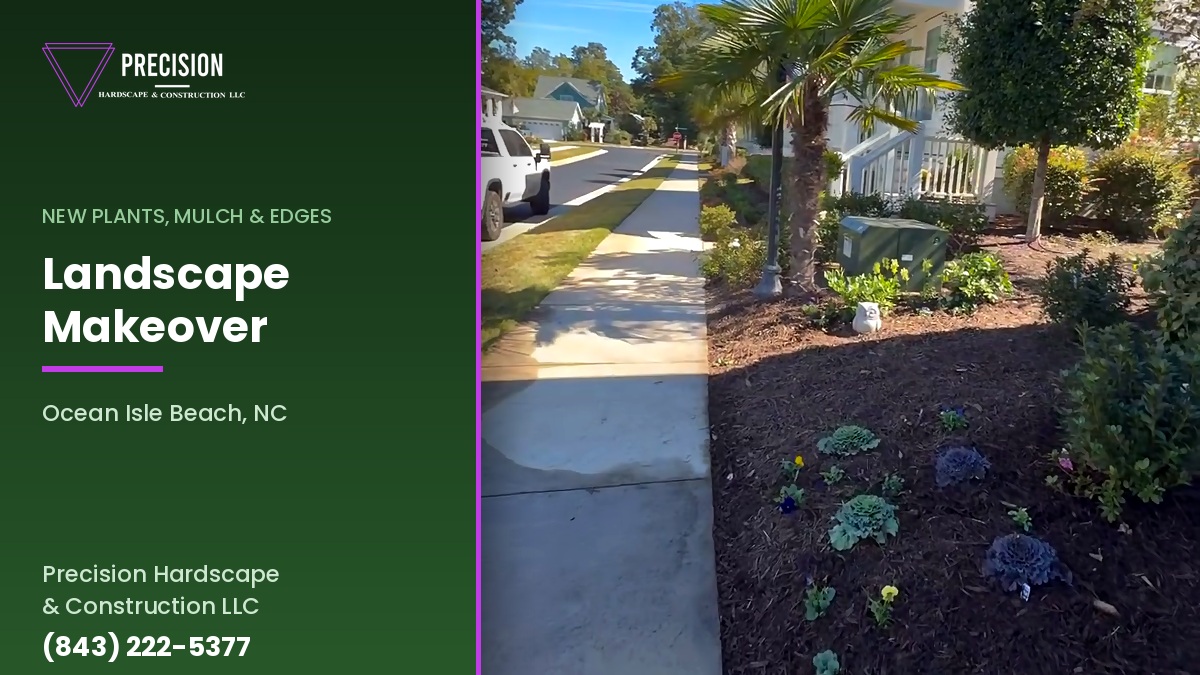
Nothing dramatic had gone wrong with this front yard in Ocean Isle Beach. That is rather the point. The beds had simply been there for years, filling slowly with tired pine straw, the plants quietly growing past the space they were given, the bed lines softening into the lawn a little more each season. One of the shrubs had become a tree. A strip down the side had stopped growing grass altogether. None of it happened on a particular day, and that is exactly why it is easy to live with for a decade.
Matt Jones and TJ stripped the whole thing back and started again. Every bit of old pine straw came out of the front beds and the back of the property, the bed lines were re-cut and marked in white before anything was dug, an overgrown tree came out of a planter bed, and azaleas, annuals and fresh mulch went in across the lot. The video below shows the property on day one and again the day the job wrapped, and what follows is an account of how a landscape renovation differs from a landscape installation, and which of these decisions actually matter.
Day one with the beds coming out, and the same property once the planting and mulching were done.
What’s In This Article
- What This Front Yard Had Become
- Why All the Old Pine Straw Came Out
- Pine Straw or Mulch in a Coastal Front Yard
- The Bed Line Does More Work Than the Plants
- When a Plant Has Outgrown Its Place
- The Shady Strip Where Grass Had Given Up
- What Went Back In, and Why
- Planting in Layers So a Bed Still Works in February
- Renovating a Landscape Is Not Installing One
- Why Autumn Is the Right Time for This Work
- What Keeping It Looking This Way Takes
- Mistakes Worth Avoiding in a Bed Renovation
- Frequently Asked Questions
What This Front Yard Had Become
The property sits in a neighbourhood in Ocean Isle Beach, the kind with sidewalks, lamp posts and front porches close enough together that everyone sees everyone else’s landscaping. The house had beds along the porch, beds running down the side to the street, a planter bed built some years ago, and pine straw over all of it.
Matt opens the first clip standing in the middle of it and describes the plan in about four sentences. All the pine straw comes out, front and back. The shady area where the sod is gets stripped and mulched instead. New plants go in. The bed edges get re-cut, and there is a white line sprayed on the grass showing where the new edge will run. A large tree gets lifted out of a planter bed that Precision built about four years ago, because, as he puts it, it is a little large for this small planter.
That last detail is worth pausing on, because it is unusually honest for a contractor to film. The bed in question is their own work, and it looked right when it was built. The plant that went in it has simply done what plants do. Admitting that is more useful to a homeowner than pretending landscapes arrive finished and stay that way.
What the yard needed was not a redesign. The bones were sound: the beds were in sensible places, the house had good structure around it, and the hardscape was fine. It needed the accumulated years taken off it — and that is a different job from the building of landscape beds from scratch we have written about before.
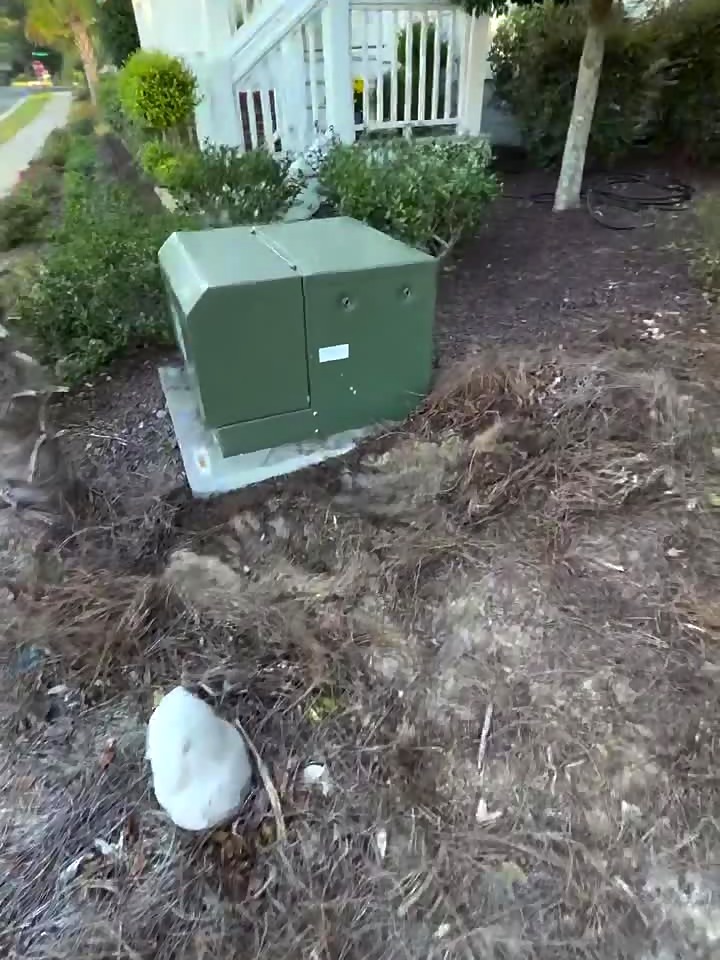
Pine straw and years of old bedding stripped back to bare soil. Everything after this is easier because of this step.
Why All the Old Pine Straw Came Out
The quickest way to make a tired bed look better is to put a fresh layer over the top of it. It is also the reason so many beds end up four inches higher than the lawn around them, with the crowns of the shrubs slowly buried and the soil underneath turned into something that neither drains nor breathes.
Pine straw breaks down. That is a virtue when you want it to feed the soil and a problem when nobody ever removes the residue. Each season’s layer part-rots into a dense felted mat, and the next layer goes on top of that. After enough years the bed is no longer soil with a cover on it; it is several inches of semi-decomposed material sitting on compacted ground, holding water against plant stems in winter and shedding it in summer before it ever reaches a root.
Stripping it back to bare soil resets all of that at once. You can see what the ground is actually doing, you can see where the roots are, you can cut a clean edge against earth rather than against a spongy mat, and anything new that goes in sits at the right level rather than on a false floor. It is the least photogenic day of the job and it decides most of the outcome.
There is a practical side on the coast as well. A bed that has been topped up repeatedly often sits proud of the surrounding lawn, which means that in heavy rain it sheds water outward across the grass and down the drive rather than absorbing it. Taking the level back down puts the bed back to work as somewhere water can soak away instead of run off.
Pine Straw or Mulch in a Coastal Front Yard
This is the decision most homeowners around Ocean Isle Beach, Sunset Beach and Calabash are actually weighing when they ring us, so it is worth setting out fairly rather than simply declaring a winner.
Pine straw has real advantages. It is inexpensive, it is light to handle, it is easy to refresh yourself, it does not wash into a dense crust, and it suits a natural, woodland-edged property beautifully. On a wooded lot with pines on it, pine straw is arguably the correct answer aesthetically as well as practically, because it is what the ground would be covered in anyway.
What works against it here is weather and wind. Straw is light, and light material moves. In the sort of rain the coast produces, and in the wind that comes with it, pine straw migrates — onto the sidewalk, into the lawn, against the front steps. It also breaks down quickly in our heat and humidity, which means refreshing it more often than you would mulch, and that is how the layering problem in the section above gets started.
Mulch is heavier, so it stays where it is put. It holds moisture in the soil through July and August, which matters more here than people expect, and it breaks down more slowly, so a bed holds its appearance for longer between top-ups. Visually it does something straw cannot: a dark, even surface makes every plant sitting in it read more sharply, and gives the bed a defined dark line against the grass and the concrete.
On a neighbourhood lot with trimmed lawn and sidewalks — this property exactly — mulch is usually the better call, which is why this yard changed over. On a wooded lot set back from the road, we would often say keep the straw. If the look you want is stone rather than either, our piece on decorative rock landscaping for coastal homes covers that third option and where it earns its keep.
The Bed Line Does More Work Than the Plants
In the first clip Matt points at the ground and says: there you can see our white line, that is going to be our new edge of our bed. It is a throwaway moment in the video and it is the most important technical decision on the whole job.
The reason is to do with how a front yard is actually seen. Nobody stands in a bed and studies the planting. They see the property from the sidewalk, from a car, from the front door, and at that distance individual plants blur into mass. What the eye reads instead is the line where the bed meets the lawn — a long, continuous curve running the width of the property. If that line is clean and confident, the yard looks cared for even in the dead of winter when nothing is flowering. If it wanders, nothing you plant will rescue it.
Marking it in paint before digging is what makes the line good. On the ground, at full size, you can stand back on the sidewalk and look at the curve from where people will actually see it. You can walk it. You can change it, because at that stage changing it costs a can of paint and five minutes. Once a spade has gone in, every adjustment is a scar in the lawn that takes a season to heal.
A good bed line also tends to be simpler than people expect. Long, gentle curves and as few direction changes as the shape of the property allows. Fussy scalloped edges look busy from the street and are a nuisance to mow around, which means they get mown badly, which means they stop being crisp within a month.

The new edge marked in white. Changing your mind at this stage costs nothing; changing it after the spade does not.
When a Plant Has Outgrown Its Place
The tree that came out of the planter bed is the part of this job most homeowners will recognise in their own yard, and the part they are most reluctant to act on.
It is a perfectly healthy plant. It is not diseased, it is not dying, and somebody chose it deliberately and paid for it. It has simply become too big for the bed it was planted in — which is not a failure of the plant and not really a failure of the planting either. Nursery stock arrives at a fraction of its mature size, and a shrub that looks generous in a bed at planting can be twice the bed’s width in five or six years.
What happens next is the problem. A plant that has outgrown its space gets pruned hard to keep it in bounds, then pruned harder the next year, and each cut takes it further from its natural shape. Within a few seasons you have a dense, over-clipped mass with bare legs and no character, taking light and root space from everything around it, and needing more work every year to look worse than it did.
Taking it out is the honest answer, and it is almost always the one homeowners are glad of afterwards. The bed gets its proportions back, the plants that stay get light, and you can put something in that will be the right size at maturity rather than something that needs restraining forever. The hard part is purely psychological — removing a healthy plant feels wasteful. It is worth thinking of it as removing a mistake about size rather than removing a good plant.
The one thing worth doing before any of this is checking why it got large and whether the same will happen again. A shrub that has thrived enough to outgrow a bed is telling you that spot suits it: good light, good drainage, decent soil. Whatever replaces it should be chosen on its mature dimensions, not on how it looks in the pot.
The Shady Strip Where Grass Had Given Up
One line in the first clip covers a decision we make on a great many properties around here. Matt points at a strip down the side and says: right here in this shady area where the sod is, we are going to strip that out and add some mulch.
That is grass being given up on deliberately, and it is the right call far more often than homeowners allow themselves to believe. The warm-season grasses that grow on this stretch of coast are among the least shade-tolerant there are. Put one in a strip between a house wall and a fence, or under the north side of a porch, and it does not merely grow thinly — it thins, it opens up, weeds take the gaps, and you end up re-sodding the same few square feet every couple of years. Our piece on why lawns die in patches around here goes into what is happening underneath when that occurs.
Turning that strip into bed instead solves it permanently. Mulch does not need light. It does not get walked thin, it does not need mowing in an awkward space where a mower barely fits, and it reads as intentional rather than as the bit of lawn that never worked. If the strip is wide enough to plant, shade-tolerant shrubs go in and it becomes a proper bed; if it is narrow, mulch alone is a perfectly respectable finish.
The general principle is simple enough to apply to your own yard: if a patch of lawn has failed twice in the same place for the same reason, it is not bad luck, it is the wrong surface. Mulch, a bed, stone or — where the space is genuinely used — synthetic turf will all outlast another attempt at grass.
What Went Back In, and Why
In the second clip Matt runs through the planting: annuals along the bed at the front, annuals in both front beds, azaleas in three separate spots, a pair of white-flowering shrubs, and a few more annuals by the utility box. Then mulch across everything and the beds re-edged.
Azaleas are the obvious backbone choice for a coastal Carolina front yard and they earn the place. They tolerate the partial shade that house walls and mature trees create, they are comfortable in our acidic sandy soils, they hold their leaves through the winter, and for a few weeks in spring they do something spectacular. Planting them in three separate positions rather than one block is deliberate: a colour that repeats across a frontage ties the whole property together, where the same number of plants in one clump reads as a single event and leaves the rest of the yard unrelated to it.
The annuals do a different job. They are the part of the planting that is openly temporary — colour at the front edge of the bed, at eye level from the sidewalk, in the season when nothing else is doing much. Putting a few by the utility box is the kind of detail that distinguishes a finished job from a competent one, because the utility box is precisely the thing everybody’s eye snags on and most planting plans ignore.
Worth saying plainly: annuals are a yearly cost and a yearly job. They are not a mistake for that reason, but they should be chosen knowing it. A homeowner who wants the colour without the annual replacement is better served by perennials and flowering shrubs, accepting that the display is shorter and more seasonal.
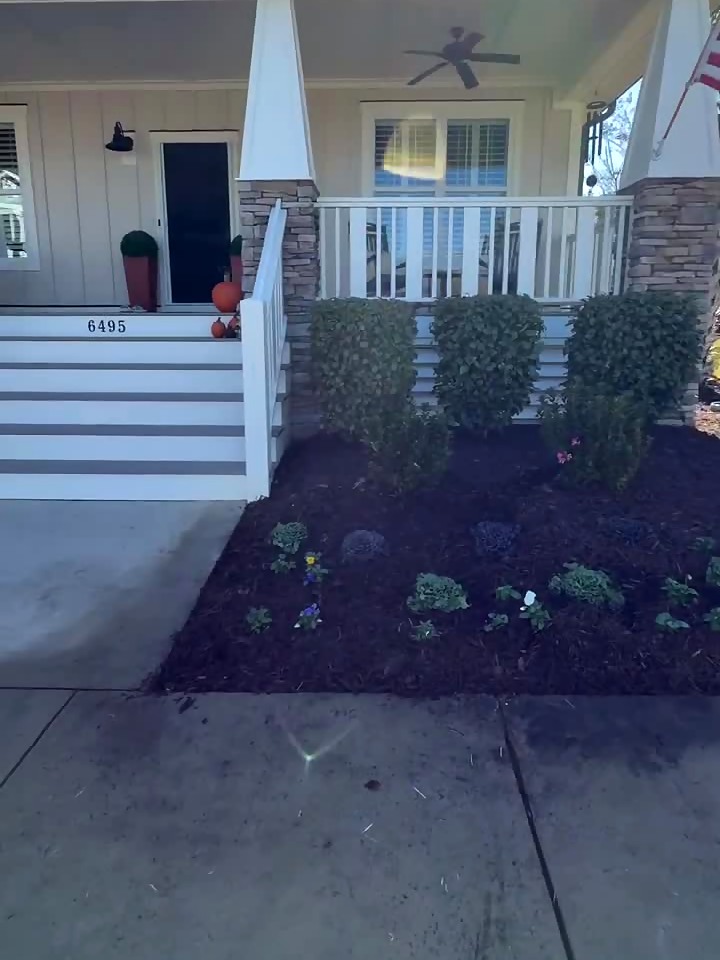
The front bed finished. The dark mulch is what makes the clipped shrubs and the new planting read sharply from the sidewalk.
Planting in Layers So a Bed Still Works in February
The reason this yard looks composed rather than merely tidy is that the planting does three separate jobs at three different heights, and only one of those jobs is flowers.
The structural layer is the evergreen shrubs and the clipped mass against the house. It carries the yard through winter, it gives every other plant something to sit against, and it is the layer you are really looking at for nine months of the year. If this layer is right, a bed looks deliberate in February with nothing in bloom at all.
The seasonal layer is the azaleas and the flowering shrubs — plants with a moment. They are not asked to look interesting all year; they are asked to be solid green furniture for most of it and then to do something worth looking at on schedule.
The front layer is the annuals and the low planting along the bed edge. This is the layer closest to the viewer, it is at the line where bed meets lawn, and it is what makes a bed feel full rather than like shrubs standing in mulch. It is also the cheapest layer to change, which makes it the right place to put anything you might want to rethink.
Most disappointing front yards are disappointing because they only have one of these layers. All structure and no colour reads as a car park planting. All colour and no structure looks wonderful for six weeks and empty for the rest of the year. The mulch, incidentally, is part of this too — it is the surface the whole arrangement sits on, and a bed with good layers over patchy, inconsistent cover never quite comes together.
Renovating a Landscape Is Not Installing One
A new landscape on a bare lot is in some ways the easier job. Nothing is in the way, the ground is whatever the builder left, and every decision is made from scratch. Renovating an established landscape is a different discipline, and it is worth understanding the difference if you are getting quotes.
The first difference is that half the work is deciding what stays. Some plants are worth keeping and have years left in them. Some are healthy but wrong — too large, in the wrong place, fighting something better. Some are quietly failing and will be gone within two seasons whatever you do. Walking a property and sorting mature planting into those three groups is the part that needs judgement, and it cannot be done from a photograph.
The second is that everything is done around things that must not be damaged. Root systems of plants that are staying, irrigation lines put in years ago, cable and utility boxes, lighting, the lawn either side of a bed that is being re-cut. A machine that would speed up an open site is often the wrong tool entirely, and a good deal of the work is done by hand for that reason.
The third is disposal, which is invisible in the finished photographs and real in the quote. Years of old pine straw, the stripped sod from the shady strip, an entire mature tree and its root ball all have to leave the property. On a renovation the volume going out can be larger than the volume coming in.
None of that makes a renovation expensive relative to what it achieves — in our experience it is one of the best-value things a homeowner can do to a property, precisely because the bones are already paid for. But it does explain why a renovation quote is not simply a planting quote with the plant list changed.
Why Autumn Is the Right Time for This Work
Matt closes the second clip with a seasonal pitch — looking to spruce up your property for the holidays — and behind the sales line there is a genuine horticultural reason this work belongs in the autumn.
Shrubs planted now have the whole of the cool season to put roots out before they are asked to do anything difficult. Our soil stays warm long after the air cools, so root growth carries on for months while top growth has stopped, and rainfall is doing the watering rather than the homeowner. A shrub planted in October faces its first coastal summer with a season of established root behind it. The same shrub planted in May spends its first July trying to grow roots and survive heat at the same time, and some of them do not.
It is easier on the crew and on the lawn, too. Stripping beds and running equipment across grass in the heat of August stresses everything involved. Doing it in cool weather means the lawn recovers from the edges being re-cut rather than scorching where it was disturbed.
And the timing does line up with the obvious thing: this is when people have visitors. A yard tidied in October still looks tidy at Christmas, because nothing is growing fast enough to undo it. Our piece on getting a yard ready for the holidays covers the rest of that list.
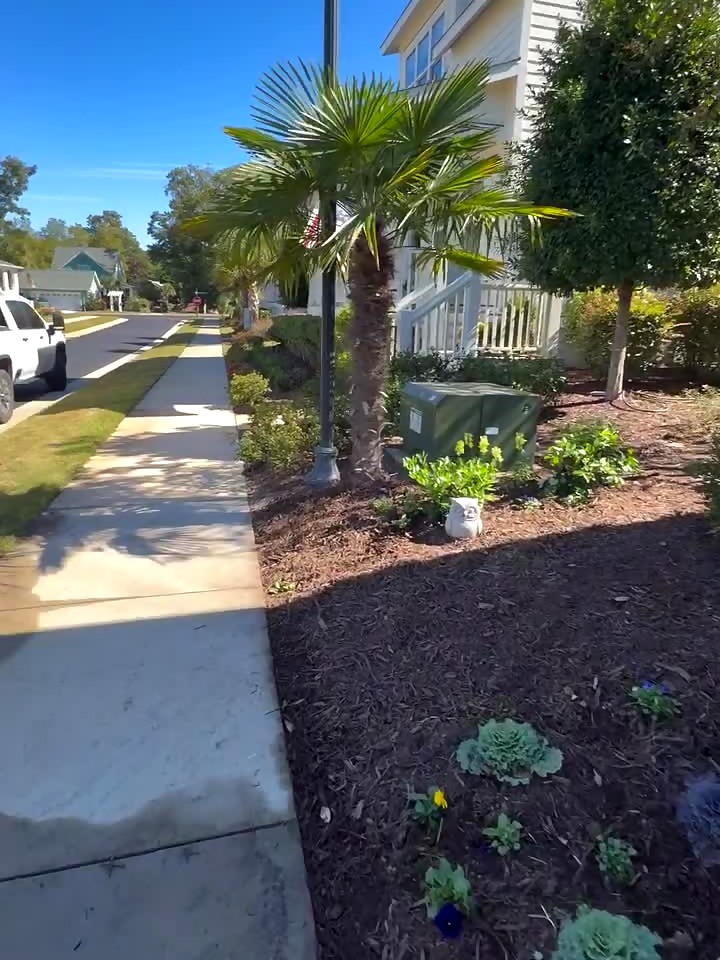
Down the side, with the bed edge cut clean against the sidewalk. This is the line people actually see from the street.
What Keeping It Looking This Way Takes
A renovated landscape is not self-maintaining, but the work it asks for is modest and predictable, and knowing it in advance is the difference between a yard that still looks like this in three years and one that quietly slides back.
The edge wants re-cutting about twice a year. Grass grows into a bed from the lawn side continuously, and a crisp edge becomes a vague one within a season if nobody touches it. It is an hour’s work with a half-moon edger and it does more for the look of a property than anything else on this list.
The mulch wants topping up roughly annually, and here is the thing worth remembering from earlier in this article: top up, do not pile on. If the bed is creeping above the level of the lawn, the right move is to take some out rather than add more. Keeping the depth at a couple of inches is enough to suppress weeds and hold moisture without burying anything.
The plants want watering through their first summer even though they went in during the cool season, because a first-year root system is still small when the heat arrives. After that, established shrubs chosen for this climate largely look after themselves. The annuals want replacing when the season turns, which is their whole nature.
And the thing to watch for over the longer term is the one this job was called out for in the first place: a plant quietly getting larger than its space. Catching that in year three, when it means swapping one shrub, is a great deal cheaper than catching it in year eight when it means lifting a tree.
Mistakes Worth Avoiding in a Bed Renovation
These come up again and again, and every one of them is cheaper to avoid than to correct.
Mulching over the old layer. The single most common one. It raises the bed, buries plant crowns, and compounds every year it is repeated. Strip it back first.
Cutting the bed line without marking it. Paint costs almost nothing and lets you judge the curve from the sidewalk before committing. A line you cannot undo is a poor place to start guessing.
Pruning a plant that needs removing. If a shrub needs cutting back hard every year to fit, it does not fit. Each round of hard pruning makes it less attractive, not more.
Buying on pot size instead of mature size. The plant in front of you in the nursery is a fraction of what it will become. Check the mature spread and plant to that, even though the bed looks sparse on day one.
Replacing grass that has failed twice. Shade, traffic or drainage killed it, and none of those are fixed by new sod. Change the surface instead.
Piling mulch against trunks and siding. Mulch volcanoes around stems hold moisture against bark and invite rot. Keep the material back from trunks, and keep it well below the siding line of the house.
Planting the whole bed in one layer. Shrubs alone look like a car park. Colour alone looks empty for most of the year. The layers are what make it read as designed.
Frequently Asked Questions
Neither is better in the abstract — it depends on the property. Mulch is heavier so it stays put in coastal wind and rain, holds soil moisture better through the summer, breaks down more slowly, and gives a dark, even surface that makes planting read sharply. Pine straw is cheaper, lighter to handle, easy to refresh yourself, and looks right on a wooded lot where pines are already dropping it. On a neighbourhood lot with sidewalks and trimmed lawn, mulch is usually the better call.
If it has been topped up for years, yes. Each layer part-rots into a dense mat and the next goes on top, so the bed slowly rises above the lawn, plant crowns get buried, and the ground beneath stops draining and breathing properly. Stripping back to bare soil lets you see what you are working with, cut a clean edge against earth, and set new plants at the correct level. It is the least visible day of the job and it decides most of the result.
About two inches across the bed is plenty — enough to suppress weeds and hold moisture, not so much that it smothers the soil. Keep it pulled back from shrub stems and tree trunks rather than mounded against them, and keep the finished level comfortably below the siding line of the house. If the bed is already sitting proud of the lawn, the right move at the next top-up is to take some out rather than add more.
Autumn, for a practical reason rather than a sentimental one. The soil stays warm long after the air cools, so new shrubs put out roots for months while top growth has stopped, and rainfall does most of the watering. A shrub planted in October meets its first coastal summer with an established root system behind it. The same plant going in during May has to grow roots and survive heat simultaneously. Cooler weather is also easier on the lawn where beds are being re-cut.
Usually, yes. A shrub that needs cutting back hard every year to stay within its bed will look worse with each round of pruning, loses its natural shape, and takes light and root space from everything around it. Removing it is not wasting a good plant so much as correcting a decision about size. Replace it with something chosen on its mature spread rather than how it looks in the pot, and the problem does not return.
Stop asking it to grow grass. Warm-season grasses here are among the least shade-tolerant there are, so a strip beside a house wall or under a porch will thin, open up and take weeds no matter how often it is re-sodded. Stripping it out and making it a mulched bed solves it permanently — and if the strip is wide enough, shade-tolerant shrubs turn it into a feature rather than a problem area.
About twice a year to stay genuinely crisp. Grass grows into a bed from the lawn side continuously, and a sharp edge becomes a vague one within a season if nothing is done. It is not a long job, and it does more for how a property looks from the street than almost anything else you could spend the same hour on.
Yes. Planting, bed renovation, mulch and decorative stone, sod and synthetic turf all sit alongside the paver patios, walkways, retaining walls and drainage work. A good many jobs end up being both, because a patio looks unfinished until the planting around it is sorted out. We serve Ocean Isle Beach, Calabash, Sunset Beach, Shallotte and Ash in North Carolina, and Little River, Longs, Conway, North Myrtle Beach and Myrtle Beach in South Carolina.
Ready to Improve Your Outdoor Space?
If your beds have quietly got away from you — tired pine straw, plants that have outgrown their space, an edge that has gone soft, a shady strip that will not grow grass — call Matt Jones and walk the property with him. He will tell you honestly what is worth keeping, what should come out, and where the money is best spent.
Precision Hardscape & Construction LLC — Matt Jones
Serving Ocean Isle Beach, Calabash, Sunset Beach, Shallotte and Ash in North Carolina, and Little River, Longs, Conway, North Myrtle Beach and Myrtle Beach in South Carolina.
Landscaping · Decorative Stone · Paver Patios · Walkways · Retaining Walls · Contact